LAST is the Leeds local campaign that helps point people towards where to help and what to do. What i intend to do is be the middle person. They are to middle person between the people and the charities and i plan to be that person helping the people get into contact with them and help raise awareness. I want to help promote events that are coming up as well as telling people basic information about the sex trafficking trade that is going on. By pointing people towards LAST they can attend events such as the film night at the Hyde Park Picture House, where Jacinta (the lady i interviewed) will be giving a very informative talk about the trade, and what people can do to get involved.


Another concept of mine is looking at barcodes. The women that are trafficked are treated as objects that are bought and sold on a regular basis, and the association with a barcode works. Therefore i have been looking at a variety of different barcodes, some from packaging i have and others from the internet that have been edited. I think one of my ideas if to turn the barcode into something that holds the information, not an image but using typography to mimic the layout.


Depending on what substrate i want to use will dictate what print process i will use. I am currently thinking about flexography to print on a plastic light substrate and digital print for advertising on huge billboards.
I went into 'GO-GIZMO' today in town to go see if they sold novelty toilet paper, which they did. However its not exactly the most 'PC' of toilet paper, but it does make me laugh. When i researched the process, the material used to print on is a tissuey paper, this is in order to hold the ink and not lose detail. So i picked up the paper to see what the texture is actually like. and its horrible. You would never 'use' it and the majority of people who sell the novalty paper actually say 'not to be used', which does seem pointless. However, seeing as my idea is to give out free toilet paper to students i don't really think they are going to be fussed about what texture it is as long as it does the job.... I don't really like the images used on this toilet paper, but it does show how detailed they can actually be which is good as i do want to use images with mine. on some of the paper the images and text split across the separate sheets which is something i want to avoid, i want them to be on the individual strips. The packaging is also very basic, just simple plastic rolled around and then a one off digital print laid inside. I want to do something a lot more inventive, possibly using the nets that we looked at for 'wrapped up'.


After researching a variety of inlets i have decided to focus my research further on the process of printing on novelty toilet paper, print process for passports and looking further into packaging and barcodes. I want to have information spread across these ideas, and in some way point towards the campaigns and charities that help with sex trafficking in the UK.
I am going to research each individually and and then develop them and then see if i can find a way to link them together in the future i will. I am going to try and design for low budget, medium and high and looking into pricing for them on a mass production side.
I really like the idea of printing on the toilet paper and handing it out to students as a free item. On the toilet paper there would be information and images that help promote action to help people in the sec trafficking trade and where they can go to get involved. which would almost certainly entail them going to see LAST.
In order to understand fully printing on toilet paper i contacted a website that i found: Printed TP. I found this site very useful, it gives you the information for you to send your individual prints on the toilet paper.
In order to send it to the printers you have to put it into a file format that is applicable to them and then essentially they do the rest. The company is based in America and would cost $31.25 and $25.00 to print + shipping costs which would be in excess of £40, which isn't exactly the best idea. I would also get 80 rolls of it which is a little unnecessary, and i don't need that amount for my project. Its interesting to see how much it would actually cost to do a batch production of this item. This would be a fairly high budget production, however if it were done on a larger scale than it could be used.
This isn't going to stop me looking into designing for it though, i really like the idea and want to take it further. I am going to work out a way to do a mock up next to give an general idea of how i would print on it.


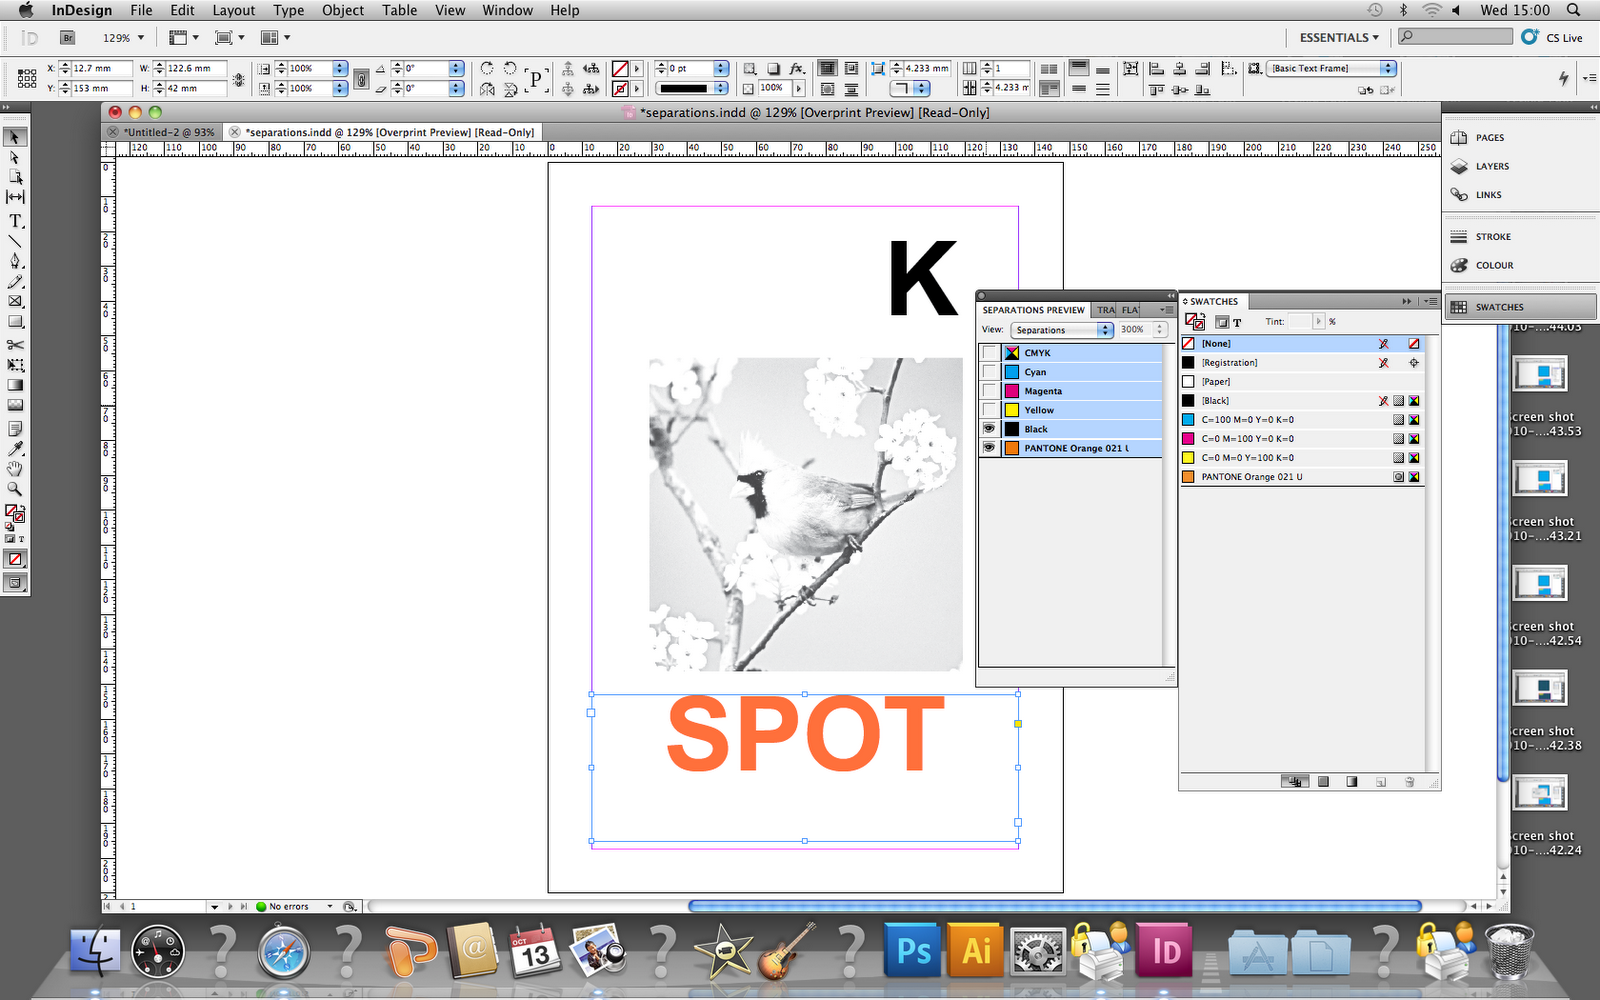


Click view and you can then see the separations and break
them down accordingly.


By going to the separations preview, you can then see
the way the image will be broken down and printed.

Getting and image ready for print:
Colour separations. In-Design will divide image up to CMYK.
Then produce black and white image for each colour. Its
the similar process to screen printing in college.

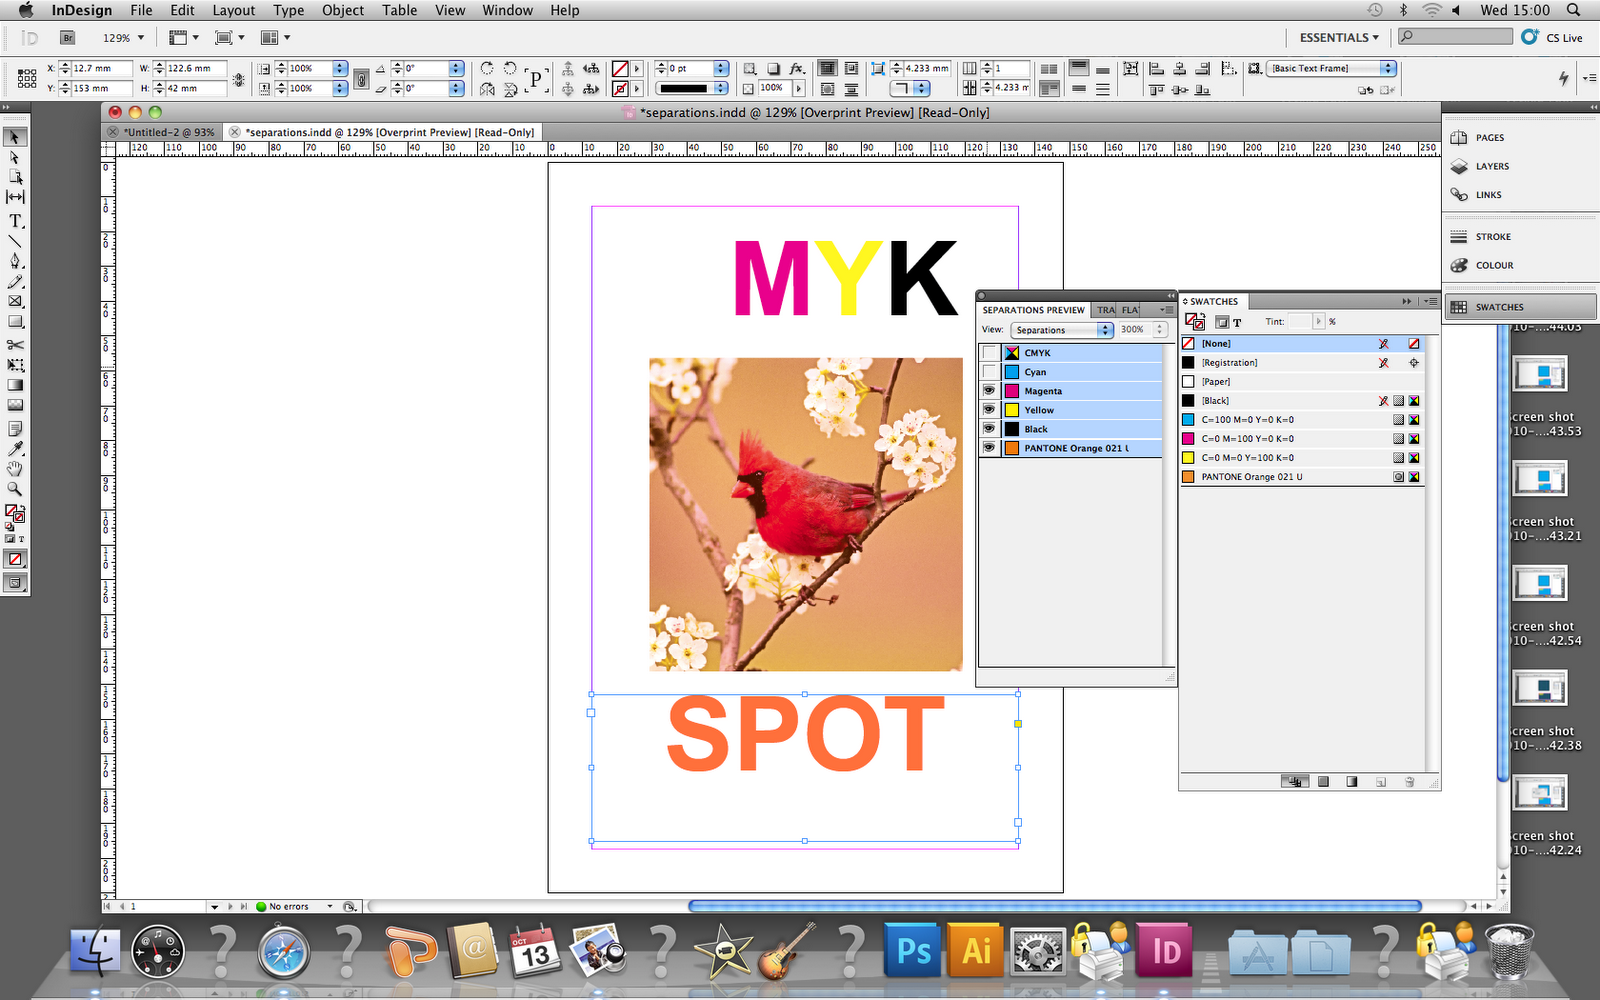
The image being changed using the swatches.

Once you have selected the image within the frame you can
then use the colour swatches to add colour to the image.

By selecting the whole image, by grabbing the circle part it will
move the image within the frame.

Here i placed a greyscale image.

here i am looking at placing an image onto in-design. By
adding an image from photoshop, the pantone duotones will transfer
automatically into the swatches library. that means you can match up the text
with the image.

By going to pages, you can then double up the page by dragging the page down below
and you have a double page.

Click add.

Select a pantone and then it will transfere.

Select the 'process' drop down menu and then select the
pantone you want to use.

The next stage is to add spot colours to the swatches. again you go through
the same process but this time you use the drop down menu
that pops up.


You can also select it by going to the drop down menu again and selecting 'New tint swatch'.
This does the same thing except you can change the tonal values you just
change the tint.

In order to change the huge and the tint, select the colour menu and then
edit it accordingly, it will then change the whole colour scheme again.


You can also take an original colour and edit it by double clicking it and
changing the tone value. By doing this it will change that colour but across
everything. So if you want that colour to be darker you do it this way.


It will then appear in your swatches menu.

Edit the colour accordingly to what you want and then add.


The next stage is to add a colour to the swatches. Its the same
process as adding a swatch in illustrator, or very similar at least.
you click the drop down menu and add new swatch.

The process is exactly the same for text except you
need to highlight the text.

Changing the weight: You select the stroke button and
then change the weight accordingly, i've done it here so you
can see it clearly.

Then switch to the outline, and select another colour.

Creating fill and adding colour with swatches:
Create the box then click the top left button, 'fill' then
select Cyan.

Bleed: Always apply bleed margin. Images always extend
over the page because of the inaccuracy of the trim. The standard
amount of trim is usually about 3mm. But always discuss with the printer,
because of substrate, files and bleed. The printer will have a preferred
amount of bleed for substrates and printers.
Facing Pages: Do you want to view the pages at the same time?
Meed to use this if its a book or a magazine.
You can always use the W buttion to takeaway margins and gutters.

Columns and Margins: These are all guides and help with
the layout of the document. They also help divide the page,
but you can still places text and images over them.

Page Size: This focuses on how big the document is going
to be, the printed and trimmed size not the actual size of the
paper. Everything is always trimmed so for example, if you wanted
to print an A4 poster, you would print onto an A3 in order to allow
for bleed etc.
Subscribe to:
Posts (Atom)